
")
So if you were quick enough a few weeks ago and you were one of the lucky 20 viewers, you would have seen a new extensive video showing off in detail the Cineroid EVF in action. Sadly that video was taken down in under an hour for whatever reason while either things were sorted out or someone got their butt chewed out. An official authorized video will be with us shortly. We did however get to see the unofficial video and grabbed all the Deets but alas we were also asked to put the Blog post we had up on pause.
")
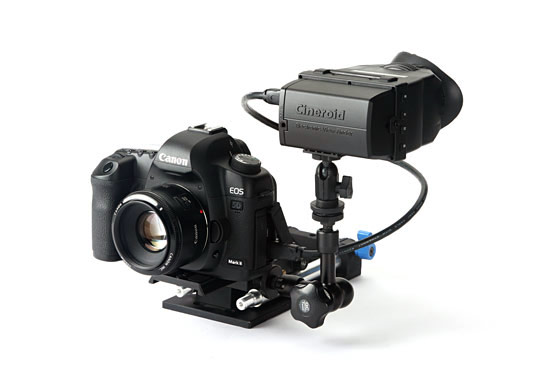
Fast Forward a bit over two weeks and we can now talk about the 3.2″ Cineroid EVF and show pictures of this hot little bugger. So move over Redrock Micro and hand back that bullshit Black Diamond Award Zacuto there is a new and very real EVF in town and it has beaten and kicked your ASS! Cineroid showed off a prototype EVF earlier in the year which looked promising and now they drop a completed unit ready to ship. Pre-orders have gone out with the production units edging close to the exit door.There will be two models the Cineroid 4L has HDMI loop through and the Cineroid 4B is without HDMI Loop through.
")
Some of the features of the Cineroid EVF you may find useful:
1. You can choose between composite and HDMI for your external input selection.
2. The HDMI input can receive 480i, 480p, 576p, 720p and 1080i signals.
3. You can adjust the colour of the LCD screen. Choose 0-50 for the colour levels. A preview window will appear on the lower right portion of the screen as you adjust your colours.
4. You can adjust the LCD brightness, contrast, and sharpness. Choose between 0-50 for the brightness and contrast and 0-10 for the sharpness. Again a preview window will appear on the lower right portion of the screen as you adjust your screen.
5. The EVF has a built-in speaker on the left side of the body and a headphone jack on the right side. The speaker and headphone volumes can be adjusted independently. You can use the speaker and headphones simultaneously and you can also mute the volume within the menu.
6. The EVF provides peaking feature in both the Red and Sharpness mode. The Red mode displays in red and the Sharpness mode displays an outline in white. The peaking feature works only with HDMI input. It does not work with Composite.
7. You can use the saturation feature to determine proper exposure.
8. You can view every corner of the image on the LCD by activating the underscan feature.
9. Enabling pixel to pixel eliminates the need for you to zoom in/out of your native video. If the native video is larger than the LCD resolution then that creates a zooming effect. Conversely, if the native video is smaller than the LCD resolution then that creates a scale-down effect. The pixel to pixel feature only maps the center of the video image. You can select either one-time mode or continuous mode pixel to pixel under Custom Setup in the menu.
10. You can view the image on the LCD in Black & White by activating the monochrome feature.
11. The aspect ratio of the EVF screen is 16:9. Activating the guide bar will provide a 4:3 ratio by making both ends of the screen area a little darker. Once you active the guide bar from within the menu, the right side and left side of the screen area will become slightly darker. The unchanged area of the screen is the 4:3
aspect ratio.
12. You can flip the video image on the LCD screen 180 degrees vertically or horizontally by activating the screen flip feature.
13. The left side of the EVF body contains the buttons PK, F1, F2, SA. The factory default for these buttons are peaking (PK), monochrome (F1), underscan (F2), and saturation (SA). Each button can be customized to a particular feature by selecting CUSTOM SETUP on the main menu.
14. You can select to view the current state of the battery usage, volume, etc. on the LCD.
15. You can select what colour you want the menu and other items to be displayed on the LCD.
")
")
")
")
")
For more details please go to Cineroid.